Sunday, November 6, 2011

Christmas Advent Traditions

I know I know, Im so being one of those people who is just jumping to Christmas before Thanksgiving, but hear me out. Since I am due any day now to "pop" I just wanted to get this up before the craziness starts! So here ya go and wish me luck. I wan't this baby out! ;) Muah!

I don't know what it is about Christmas Advents but I LOVE LOVE LOVE them! Maybe it's the memory of taking out the tiny chocolate candies from my older sisters advent when I was little. Or possibly the excitement of counting down the days  until presents. Whatever it may be, Im in love. 
When it all started a few years back, it was simple.  We began with an old school paper Christmas chain. You know. Those ones you make when your in kindergarten? The paper chains that you rip off to help you count down the days until Christmas? We would gather together as a family and write down: things that could bring us closer as a family, closer to Christ, and closer to others as we served them. I guess I was so burnt out about Christmas sometimes just being about "stuff" and "what am I getting." I wanted to get away from the idea of just getting presents and move to creating memories. Really celebrating all that Christ did for us. So that is why we started "building traditions" on each day instead of just pulling paper off a chain. :) It has been a blessing in our home for sure and really brings the spirit of Christmas into each day. And it changes as we add more and more things to it as the years go by. So feel free to download these tags to start you off. They are the size of business cards. :)  


Well, after the chains kept breaking I decided to make something a little more permanent. So here it is in all its glory! This is what happens when felt meets cotton fabric! Heavenly! Ta-Dah! O Christmas tree, O Christmas tree.... la da da da da da da! Now the kids put the Christmas tradition tags into the pockets and a little candy too! They LOVE it and it really brings the spirit of Christmas into our home. That is what Christmas is about right? So don't forget the reason for the season whatever you choose to celebrate! 

My boys and I... and my baby bump...

I hope you like it! Give me some feedback to let me know what you think and if you think I should open an etsy shop? IDK? 
Anywho, what kind of traditions do you celebrate?
Loves! 
Rachel          
To download click here: ADVENT TAGS

Saturday, October 29, 2011

Halloween Bags!

So I had these little Halloween bags laying around from last year. So I thought I would put something fun on them for the kids! I found it all at Michaels and it took me 5-10 minutes to assemble! So fun and easy. Anywho I hope you enjoy and HAPPY HALLOWEEN! 
Materials: 
Cloth bag
Pack of felt Halloween figures (Michael's)
Liquid Stitch or needle & thread
Fabric Paint and Stencil for name


Step 1: Paint Name-
Paint name with a stencil. Or you can cut out letters and liquid stitch them on. You pick. 


Step 2: Attach Halloween figures-
These little guys already had sticky stuff on the back but I still put liquid stitch on them because I have a little man who likes to pull at things... Im pretty sure he's pull them off if he could. So place those babies where you want and them stick them on with some glue. :) Let dry. 


So easy and so fun! My crazy boys love them and I hope you do too! Happy Scaring everyone! Loves-
Rachel  

Tuesday, October 11, 2011

Halloween!

Here's just a little something I whipped up in a jiffy. It's fun to see what you can do with a little paint, paper and Modge Podge! :) Happy Spooking Everyone!  
Loves Rachel 

Friday, September 2, 2011

Giveaway Time!

It all started with my little Superman. You see he has been obsessed with Superman for a while now. Playing with his little figurines. Singing made up Superman songs. Using our kitchen towels (yes our towels!) for "Superman capes." It's been a super time, let me tell ya. So, in honor of my little Superman, this giveaway is for you! :)  
(Scroll down to see the GIVEAWAY!!)


Da da da da!!! AND this is what Im doing for my giveaway? 


It's super isn't it?  What little boy doesn't want a Superman cape? My little Superman loves his. He run's around the house everywhere with it saying he's "Super AJ!"


So, if you'd like to win this lovely giveaway, you must do the following:
You can enter up to 9 times for this giveaway:
 MANDATORY! 
 1. Become a public blog follower of bloomingmommy
Sample comment: I am a blog follower of bloomingmommy
2. Become a facebook fan of bloomingmommy
Sample comment: I am a facebook fan of bloomingmommy under the name Jane Doe 
3. Blog about this giveaway. (leave a link)
Sample comment: I blogged about this giveaway at janedoe.blogspot.com
4. Link to this giveaway on Facebook (leave a link)
Sample comment: I facebooked a link to this giveaway at this link: http://janedoefacebook
5. Add the bloomingmommy Button to your blog.
Sample comment: I added the bloomingmommy button to my blog at janedoe.blogspot.com
6. Tell us what you love about bloomingmommy and what you would like to see more of.
Good Luck everyone!!! This giveaway ends September 30th so get the word out! Loves!
Rachel 

Thursday, August 11, 2011

Im Back

Dear Friends,
My long absence from blogging has now come to a holt.
Forgive me. 
In between moving my Mother, growing a baby, family reunions and road trips, it's time to get back to life as we know it.
So here I am again ready to rock it. Oh yes, be prepared cause I have a giveaway coming up next. Until then enjoy the pictures of my latest happenings and I'll see you soon. Loves! 
Rachel 


Love my little ones! Fishing in the Mountains...


Carrying my 86 year old blind amazing Nana...


My sweet Marmey and I...

Sunscreen anyone...


Celebrating my handsome hubby's Bday at Pismo...


The Lovely baby bump... it get's bigger every day... Tina's however goes away after she digests her food! No fair! 
Loves and See You Soon! 
Rachel 

Monday, July 4, 2011

Cake "Pops"

Happy 4th of July everyone! Let freedom ring! I hope you all have a great day filled with hot dogs, hamburgers, salad and watermelon with everything red, white and blue! 
I decided to make some cake "pops" because my little man has been asking for them every day. These are fun cause they pop in your mouth. Safer than fireworks I should say but with the same kind of effect. :) 
If you have never made cake pops before head on over to the lovely bakerella. I love love love her cute pops! 
The only thing I did different was instead of sprinkles, I used strawberry Pop Rocks! 


Enjoy and have a Happy 4th! Muah! 
Rachel 


Tuesday, June 21, 2011

Happy Father's Day!

So I thought I'd share these fun cookies with you! I made them for Fathers day. Since our Church always trys to do something nice for the Holidays, I was able to make a heap of them for our Daddio's! So I hope you enjoy. They were a hit! Muah! 
Rachel


All Wrapped up! 


Yay for the #1 Dad's in our lives! 

Tuesday, June 7, 2011

Toy Themed Organization Bags


When I saw this:


I knew our whole toy storing situation desperately needed to be dealt with. Our one basket just wasn't cuttin it anymore! At first I went venturing out looking for some cute storage bins, baskets or shelves. NOTHING!!! It was either too expensive for what I desired or not what I needed. 
So I decided to make "Toy Themed Bags." We have a whole heap of Toy Story toys, Pirate toys, Cars toys, Animal toys, Train toys and so on. You get the picture. So I made some bags to go along with the toy specified. Example: Pirates go in the Pirate bag. Toy Story goes in the Toy story bag and so on! The boys LOVE this idea and it's SUPER easy for them to put their toys away! Works for us! Soooooo, come see how we did it and then make some yourself! It takes about an hour (or more if your a new sewer) to make. :)


Materials:
About a yard 1/2 of material (I used snuggle flannel cause it was on sale....super sturdy too)
Thread to match
Rotary Cutter
Cutting mat
Ruler
Rope for drawstring (Wal-Mart or JoAnns)
Sewing Machine
Iron and Ironing board


Step 1: Measure and Cut
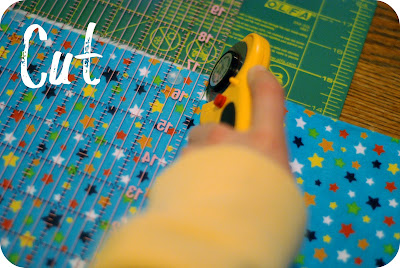
First you are going to measure and cut your material. I folded my material  in half wrong sides together to see how big I wanted it... think of it like folding a piece of paper in half. (I measured about 22in. or more cause I wanted them big)  You decide how big you want yours to be and then add about 4 1/2 inches to the top for the flap. (see later how we put in drawstrings)


Step 2: Whip It... Whip it good!
You want to whip stitch (the zig zag stitch) all around the edges of your material to avoid fraying. It just makes it look nicer too. :) 


Step 3: Fold, Iron and Sew Edges
Fold down your edges and iron down. You can pin if you want, but I just glided it on through my sewing machine. Sew along the edge carefully until all edges are done. 


Step 4: Pin and Make a Flap
After edges are complete, fold fabric in half right sides together. Sorry my picture is so bad, it was late. Anywho, pin the edges of your fabric together as seen in my "great" picture! ;) (Follow the arrows)
At the top of your bag you are going to want to leave about 4 inches unpinned in order to make a flap for your drawstring to go through. YOU WILL NOT BE SEWING the 4 inches at the top yet... so hold on to your horses! ;) 

After pinning together, start sewing your sides and bottom. See picture for where to start and stop. Remember you need at least 3 and 1/2 to 4 inches un-sewn at the top. Start and stop at the lightening bolts. :) 


Step 5: Drawstring Time
After sewing, grab your drawstring and place it at the top of your bag like so. Measure how much you want to use. I layed it on the top and left about 3 inches hanging out of the sides to tie at the end. 

Flip extra fabric or flap over your drawstring and pin. You can either keep your rope there and continue pinning of remove it and stuff it through later... it's up to you. 
Then pin it down. Make sure to ONLY pin the flap part together, NOT ALL of your fabric. You want to still make it a bag remember, so it needs an opening. :) (sorry I don't have a picture of it)

Step 6: Sewing that Flappy thing
Sew your edges together to make it easier to sew the flaps. Start at arrows and then stop at the cute little lightening bolt. :) (about 2 inches)

After you sew both sides, open up your bag and slide it onto your sewing machine to sew the flap together. Sew it all the way around and viola! Your done with the sewing part.

Then take your cute little snake of a drawstring and start pushing it through. I call it the chinese finger trap...

After the trap, flip your bag right side out. Tie knots in the end to avoid fraying. (You can even burn the tips of you want to go the extra mile)   
Now my littles insisted on having a "Buzz Lightyear" bag. So I decided to apply an applique to it when it was finished. I simply sewed around the edges of buzz and through his middle to ensure safe holding. :) Love it! 
So there you have it! I made a few and now have a little bit of order to my mayhem! I hope you have fun making yours! Happy Sewing! Muah! 

Wednesday, April 27, 2011

Visit's to the Toilet...


Well my lovely friends, first I want to apologize for being M.I.A. for so long. I have a good excuse if you will. You see, it all started when I began feeling overly tired and exhausted a few weeks back. I would complain to my poor husband that my boobs hurt, I was bloated (Im sure he loved hearing that!) and that I caught the flu which glued me to the toilet for a day. 
Time passed and yet I was still in denial. 
More naps.
More tiredness.
More nauseated spouts.
I was late. You know. Late. Like. 2 weeks late! 
So still being in denial, I sat on the toilet one morning, did my business and bam! The little pink stick said I was preggo! I stared at it and literally said, "nuh uh." (I think because I haven't had a great record with pregnancy tests actually working for me. I have previously taken 4 week after week that said negative results. We had to get a blood test which said I WAS pregnant. Crazy!)
But this one actually worked!
My husband wasn't home yet.
I couldn't wipe that silly smile off my face. 
He walked in and I had him go look at it. 
We couldn't be more excited!
So here's to baby number 3! We already have 2 beautiful boys and life is grand! I wonder if we'll get another bruiser or a girl to dress up in pink? Hmmm, either way we are excited! So please forgive me for not posting lately. I have a good excuse don't you think? 
Loves! 
Rachel 

LinkWithin

Related Posts with Thumbnails