Monday, May 31, 2010

Crochet Edge


I have been dying to learn this technique for what seems like FOREVER! I think it started when my friend made this oh so cute blanket for my little man back in October. You could find him wrapped up in it everywhere he went! I was hooked and had to learn how to do it.
If you don't know, hemstitching dates back to the early 1900's. Hemstitching is a beautiful art where delicate lace was crocheted around bed linens, table cloths and more. They make the cutest baby blankets (or any other occasion blankets your creative minds can conjure up). So have fun sprucing up your layers with some cute crocheted edges.
TIPS:
When begining: Start with something small, like a burp cloth. You can get your practice in as you get the hang of using your crochet hook, properly holding your fabric, and stitching a snug stitch. If you start with a blanket (and bless you if you do!) then you may find yourslef saying, "I swear I just went around this corner... didn't I?" Once you get your rhythm (and you will get it!) try a blanket.
Now there are several stitches you can make. Im going to start first with the basic stitch. 
Tools Needed:


1. One pre cut baby bib cloth with hemstitch around edge (make a pattern on paper, trace with pencil onto fabric, cut then sew stitch around edge) or you can buy already hemstitched bibs here. I like to create my own because there are more options of cute fabric you can get yourself.
2. Crochet Cotton # 10(it's the thread you use to crochet around the edges)
3. Crochet Hook #5 or 1.57ml (but of course!)

Step 1.
Do It Yourself Hemstitch:
First you are going to start out with your flannel. Cut out two matching pieces to desired size. When finished, lay pieces on top of each other evenly.

Sew your pieces together CLOSLY around all edges with the following stitch. If you have a hemstitch setting, use that. This works just as well but makes the stitching farther apart.
Hemstitch closely around the edges.
Then you have your cute little hemstitch.


Step 2: The Stitch
Make a slipknot. If you need directions, go here.


Now that you have reached your end, your going to punch through the hole on top of your material. (I hope that makes sense, see my horrible night time picture)

After you go through the top and have another loop, you can either continue and make another row OR just stop and tie off there. If you choose to tie off, go through your loop twice and knot the end. Them tuck extra into your stitching.


I hope that makes sense! If you have any questions let me know. Happy stitching everyone and let me know how it goes! Loves! Muah!
Rachel

Wednesday, May 19, 2010

Tortilla Soup


Hello you happy little cooks out there! I have a yummy soup recipe for you! It's easy to whip up in a jiffy and scrump-chu-less-ant (aka delicious!) So try it out and make your dinner a little easier for once! Loves!
Tortilla Soup
*2-3 Tbs EVOO
*2 Tbs of Minced Garlic
*1 Onion
*4 Regular Carrots
*1 Stalk of Celery

*2 Quarts Organic Chicken broth
*1 Rotisserie Chicken, deboned OR 6 boiled chicken breasts: shredded
*1/2 bunch of Cilantro
*2 Cans Black beans (or you can soak your own the night before which is nice too!)
*1 Can Kidney beans
*2 Cans of Diced Tomatoes (I used Italian seasoned but usually I use mexican seasoned)
*1 25 Ounce Can of your Favorite Salsa (or more... I like it spicy!)
*Sour Cream
*Tortilla Chips
*Mexican Cheese
In a big pot sauté garlic, onion, carrots, celery in olive oil until onions are clear. Add broth, chicken, cilantro, beans and salsa. Let simmer on low-medium heat for an hour or so. After veggies are cooked, serve. Top your soup off with tortilla chips, sour cream and shredded cheese. Enjoy!

Tuesday, May 18, 2010

Monterey

Hey Gals! Sorry it's been a while! Our little family took a trip to Monterey Bay! It was awesome, and for those of you who have NOT been... its a must! Cute little town! We even went to the aquarium and had a blast! They have all these cool kid interactive areas and activities for the little ones to be entertained with! My little man could not get enough of the tunnels (his size) filled with little windows where he could peek at the fish! Fun! Anywho, while we drove... I worked on some edges for some blankets!
Tutorial coming soon so get excited!

Sunday, May 9, 2010

Happy Mother's Day!

“Motherhood is the greatest potential influence either for good or ill in human life. The mothers image is the first that stamps itself on the unwritten page of the young child's mind. It is her caress that first awakes a sense of security; her kiss, the first realization of affection;her sympathy and tenderness, the first assurance that there is love in this world...this ability and willingness properly to rear children...make motherhood the noblest office or calling in the world...she who rears successfully a family of healthy, beautiful sons and daughters...deserves the highest honor that man can give and the choicest blessings of God.”- McKay

Happy Mothers Day! Your amazing! I hope your day was as amazing as mine! My husband spoiled me (like he does EVERY day!) I awoke to the sweet voice of my little #1 saying, "Mommy, are you ready for breakfast? Get up Mommy, get up!" Then he ran out of the room and came back with a shirt. It said Worlds Coolest Mom on it! So fun! My husband then gave me kisses (yum) and a wonderful breakfast of Spinach Quiche, homemade lemon yogurt with Tahitian vanilla granola and raspberries! Scrump-true-less-unt! I died and went to heaven. The day was filled with little acts of kindness from my boys and we even spent time with the Mom's while the hubby's made dinner. It was great! AND since Im not spoiled enough, lol.... my husband even surprised me with my very own Cricut! Thanks baby for an amazing Mothers Day! 
Rachel

Friday, May 7, 2010

Mommy List


"Recognize that the joy of motherhood comes in moments. There will be hard times and frustrating times. But amid the challenges, there are shining moments of joy and satisfaction."- Elder Russel M. Ballard

I have to tell you about my day! It wasn't anything grand, but it was special.
If any of you are like me, you have a million things that cover your To Do list. Work, keep up on neverending laundry, do the dishes, tidy up, pay the bills, care for the children, run errands, do the shopping, cook dinner, kiss the hubby, be crafty, blog (((haha!))) .... well, the list could go on forever!
So I started a new list. A "cute and crazy things my kids did today" list. I had a pen and pad of paper close by to record such events. :)
At the end of my day, my list consisted of:
Hats, chocolate milk, head stuck (lol), store melt down recovered by let him carry his own basket, love, "I luv ooooo mommy!", movie time and snuggles, sweet kisses on my cheek, big helper, put clothes away all by himself, nap time, helped make dinner for a friend, belly laughing with brother.

They were words to remind me of blessings today. As I jotted them down on paper I found myself looking for more sweet moments in the day . It was fun and I barely thought of getting my to do list done. That is mommyhood.

Some times we find ourselves telling our children, "ok, Ill play with you after..." or "just a minute, I need to finish...." or "go outside and play..."

Just take a moment.

Today was different.

I found the beauty in being a Mom. Even if it was just a few precious moments of counting my blessings.


Chocolate kisses! Yes he was giving out chocolate milk mustache kisses for free!

If you look closely at my lil man's cheeks, you'll see where this guy got attacked by the chocolate kissing monster!

Thursday, May 6, 2010

Cake Class 1


Ok ladies! Ever since I can remember I have always wanted to learn how to decorate cakes! Im a nerd like that. Well, Im super excited about this! Im currently taking a cake decorating class from the amaza-za-zing Shaelyn! She is one of a kind (and a wonderful mother-in-law!) and has MANY talents... but the talent that she is sharing with us today is how to decorate a cake! Yumm! She has done many a cake in her day and is incredible! From weddings, birthdays, showers and every day occasions she has made beautiful creations to bless the lives of others! NOW, she is teaching us!

Tools: Cake leveler, Fondant smoother, Straight spatula, Wheel cutter, Non-stick rolling pin, Silicone fondant work mat, Food color paste, cookie cutters, Ingredients for frostings (see below)

So our first order of business!
Make a cake and frosting!
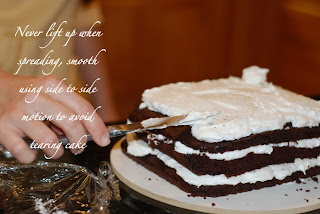
I just used a chocolate store bought cake. Bake it according to directions, let it cool and then wrap in plastic wrap and let sit over night. It helps the cake not to be so crumbly. Little did I know, chocolate crumbles the most, but owell. I worked with it. Next, the frosting... for inside the cake.


BUTTERCREAM RECIPE:
1 C Crisco
1 tsp clear butter flavor
1 tsp vanilla flavor
1 tsp salt
Mix well with hand mixer, medium setting
Add
2lbs powdered sugar (all at once)
1/2 C milk
start mixing slowly, gradually increasing the speed until high


It’s fondant making time! You will need:
1 pkg Mini Marshmallows
2 Tbs Water
2 lbs Powdered Sugar
(or you can just go buy your own fondant... this recipe tastes much better tho!)


If it’s not very pliable, stick it in the microwave for a few seconds until workable


Round cakes are easier to apply fondant so you may want to start out with a round the first time.


If you have any questions, or would like to share your creations let me know! Now go practice! Happy baking! Oh, and here’s some tips for you about working with fondant. Muah!

TIPS:
*Tip: Rolled fondant is versatile. It can be tinted, flavored, modeled, formed, twisted, imprinted, and shaped into numerous of decorative pieces.
*Tip: Before applying fondant, a "sticky" surface should be applied to the cake which will help the fondant adhere to it. Many spread a thin layer of buttercream before laying out the fondant.
*Tip: When using rolled fondant to make decorations from, roll it to 1/4-inch thick. Either place them flat on greased (use shortening) wax paper or over forms to dry for 24 to 36 hours. Use royal icing to adhere fondant pieces to a rolled fondant iced cake and for the fine decorating commonly used on wedding cakes.
*Tip: The cake to be covered with rolled fondant must be cooled completely, preferably 24 hours, covered. This will tighten the crumbs and make the cake more solid.
*Tip: Fondant dries quickly, so while working with it, always keep excess well-wrapped in plastic, as well as the parts on the cake you are not working on.
*Tip: Once wrapped, unrolled fondant keeps for 1 to 2 months at room temperature. Do not refrigerate or freeze. If it gets too hard, put it in the microwave for a few seconds to soften; it will be easier to knead.
*Tip: To smooth out the fondant once it is put on the cake, use cornstarch on your hands to smooth out the fondant.
*Tip: If tiny cracks appear in the surface of the fondant, knead it a little - the warmth from the kneading or pressure from the rolling pin will make it smooth and satiny. Do not use water to smooth out cracks - water dissolves fondant as it is mostly sugar. Instead, use a bit of shortening on your fingertips to repair small tears.
*Tip: Cracking can also be caused if your fondant is rolled too thick. Fondant is heavy and if not rolled thin enough (1/4-inch thick is usually best) the excess can pull the fondant from the top of the cake causing it to crack.
*Tip: To cover a crack, try rubbing a little of the same Fondant over the crack in a circular motion, then using a smother or your hands to rub it in.
*Tip: Try to work with fondant in a cool room and on a cool surface. A warm room may make the fondant too soft and difficult to work with.

LinkWithin

Related Posts with Thumbnails